10.3.1 Service Providers
Overview:
· The Service Providers Page lists all the attribute records stored in the module and provides different Filters, Actions, and Tools that can be used according to the requirements. For more details (refer to section 5 Filters, section 6 Actions and section 8 Tools).
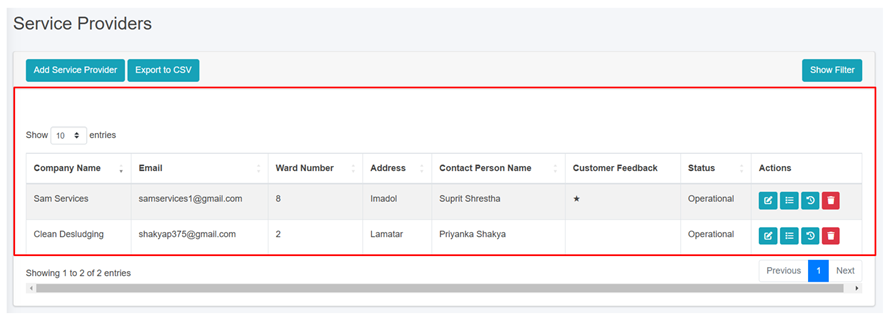
Figure 10- 6 list of Service Providers
b) Add Service Provider
· Click on the Add Service Provider button.
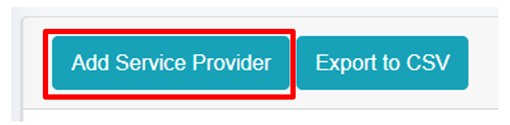
· This redirects to the Add Service Provider form page:
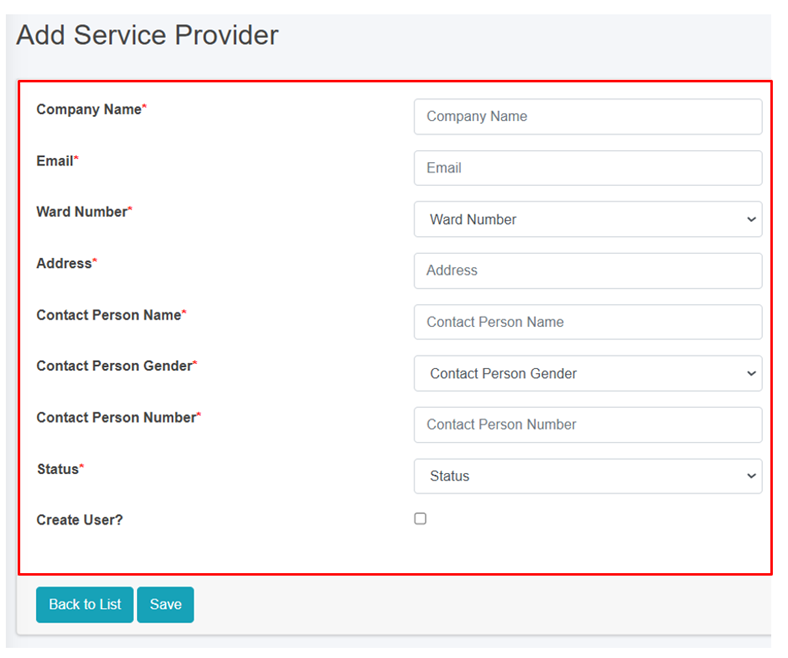
Figure 10- 7 Add new Service Provider
- After filling out the form, click Save and make sure a pop-up message is displayed, refer to section 7.1 Save for more details.
- If a mandatory form field is left out or any form failed validation during the form submission a validation message box will be prompted, refer to section 7.2 Validation Message Box for more details.
Overview:
The Add Service Provider page consists of information that are explained below:
· Company Name – Name of the Service Provider Company.
· Email – Email address of the service provider.
· Ward Number – The ward number where the service provider is located in.
· Address – Address of the service provider.
· Contact Person Name – Name of the company head/ proprietor/ contact person of the service provider.
· Contact Person Gender – Gender of the contact person.
· Contact Person Number – Contact number of the contact person/ service provider office.
· Status - Indicating the operational status of the service provider active or inactive. If the status is set as ‘Inactive’, then the service provider is disabled.
· Create User - If the user chooses to create a new user for the service provider (with Service Provider Admin role), then the user needs to check the Create User option and fill in the "Password" & "Confirm Password" fields, which will allow the user to log in. However, if a user doesn't select the "Create User" option, the password fields won't be visible, and the service provider user will not be created.
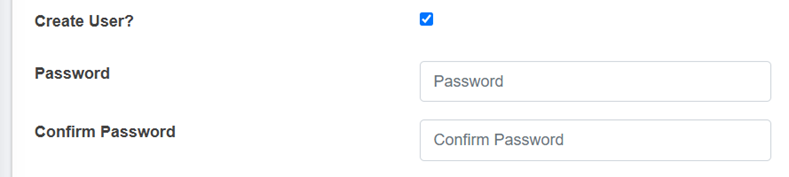
- Password: Password for the new service provider.
- Confirm Password: Confirm the password for the new service provider.
Note:
- The deletion of service provider data is not permitted, where its data is connected to any application, Desludging vehicles, Employee Information and the associated user. The user is only allowed to set to non-operational.
10.3.2 Employee Information
The Employee Information module maintains information related to the employees of the service providers.
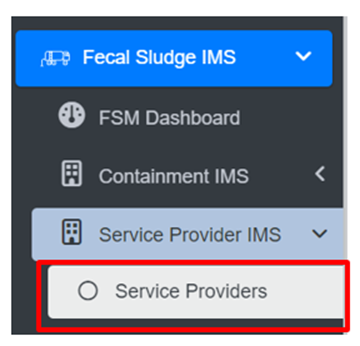
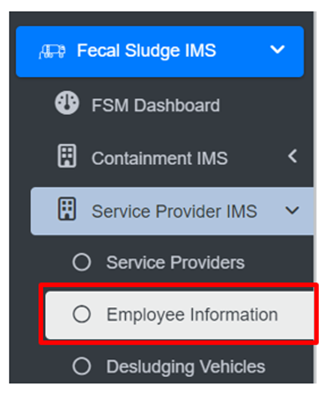
• Open the sidebar and click on Fecal Sludge IMS to expand.
• Now, click on Service Provider IMS and select Employee Information.
Overview:
The Employee Information Page lists all the attribute records stored in the module and provides different Filters, Actions, and Tools that can be used according to the requirements. For more details (refer to section 5 Filters, section 6 Actions and section 8 Tools).
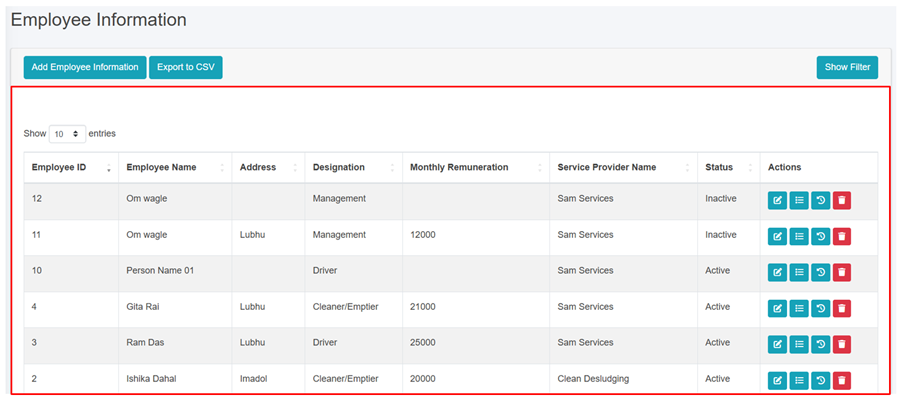
Figure 10- 8 List of Employee Information
b) Add Employee Information
· Click on the ‘Add Employee Information’ button.
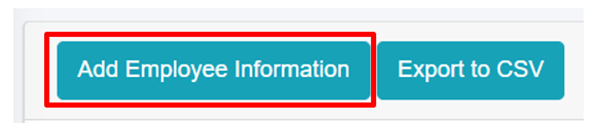
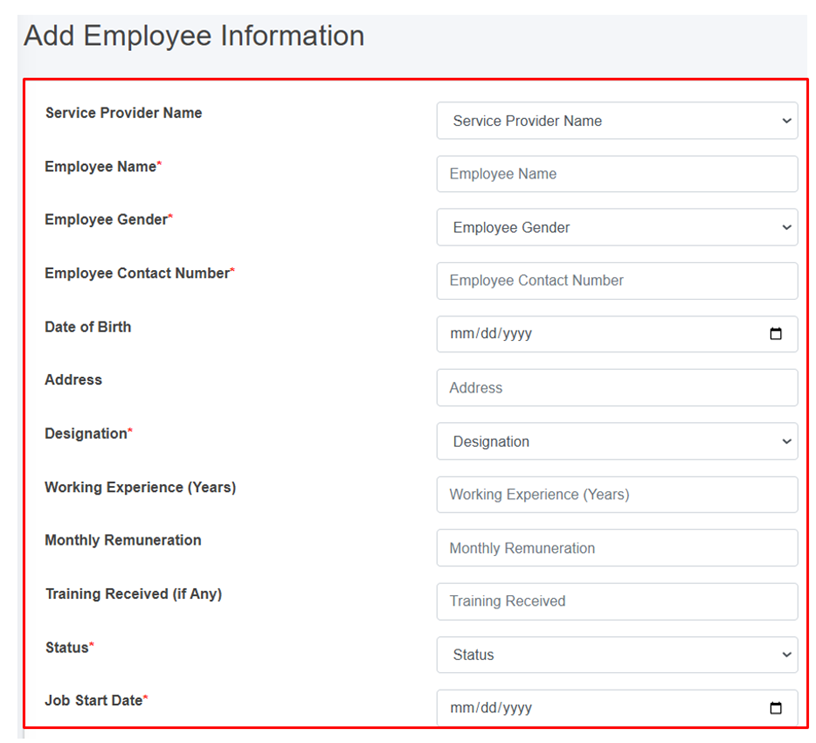
Figure 10- 9 Add Employee Information
- After filling out the form, click Save and make sure a pop-up message is displayed, refer to section 7.1 Save for more details.
- If a mandatory form field is left out or any form failed validation during the form submission a validation message box will be prompted, refer to section 7.2 Validation Message Box for more details.
Overview:
The add employee information form fields are explained below:
· Service Provider Name: Name of the service provider selected from list of pre-registered service providers. The dropdown menu for selecting the Service Provider name displays the names that are maintained in the Service Providers sub-module of the Service Provider IMS module. If the Service Provider’s Status is Non-operational in the Service Provider IMS module, they won’t be included in the list.
· Employee Name: Name of the employee.
· Employee Gender: Gender of the employee.
· Employee Contact Number - Contact Number of the employee.
· Date of Birth - Date of birth of the employee.
· Address - Address of the employee.
· Designation: Designation of employee.
o If the user selects “Driver” as the designation, two additional fields will be displayed.
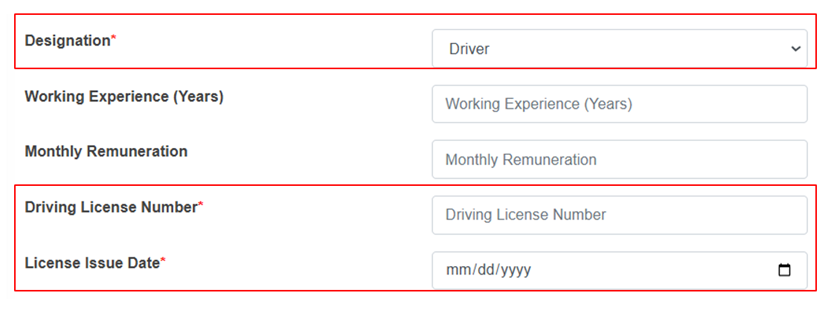
o Driving license Number – Unique identification number of the employee’s driving license.
o License Issue Date – The date on which the driving license was issued.
· Working Experience (Years) - Number of years of working experience of the employees.
· Monthly Remuneration - Monthly wage of the employee.
· Training Received (if Any) - Any trainings the employee has completed.
· Status: Indicates the operational status of the employee, active or inactive. If the status is set as ‘Inactive’, then the employee’s account is disabled.
· Job Start Date: Start date of the employee's employment.
Job End Date: End date of the employee's employment. (The Job End Date field is displayed if the status is inactive.)
Note:
- Deletion of employee information is not allowed if is associated with the ongoing emptying process.
10.3.3 Desludging Vehicles
A desludging vehicles sub-module maintains information related to a desludging vehicle also known as a sludge removal truck or a vacuum truck. It also maintains related information such as removing sludge and other waste materials from various sources.
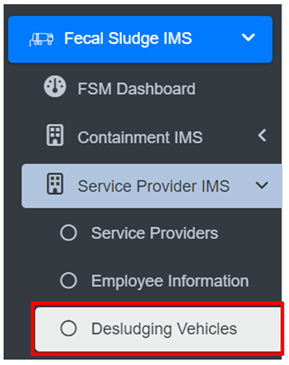
· Open the sidebar and click on Fecal Sludge IMS to expand.
· Now, click on Service Provider IMS and select Desludging Vehicles.
Overview:
The Desludging Vehicles Page lists the records stored in the module and provides different Filters, Actions, and Tools that can be used according to the requirements. For more details (refer to section 5 Filters, section 6 Actions and section 8 Tools).
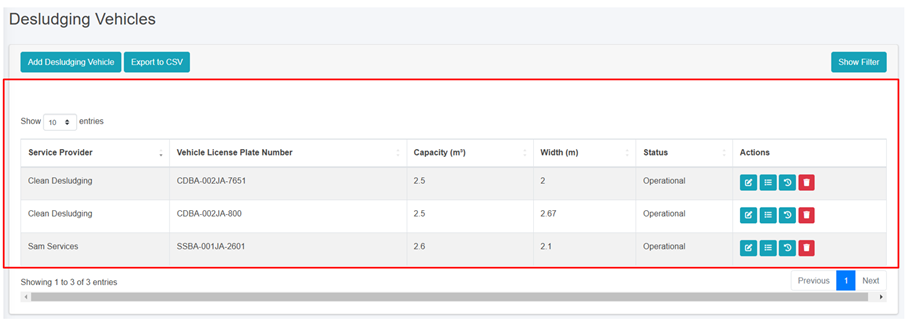
Figure 10- 10 List of Desludging Vehicles
b) Add Desludging Vehicle
· Click on “Add Desludging Vehicle” button.
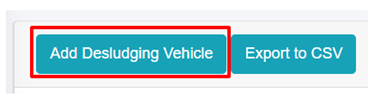
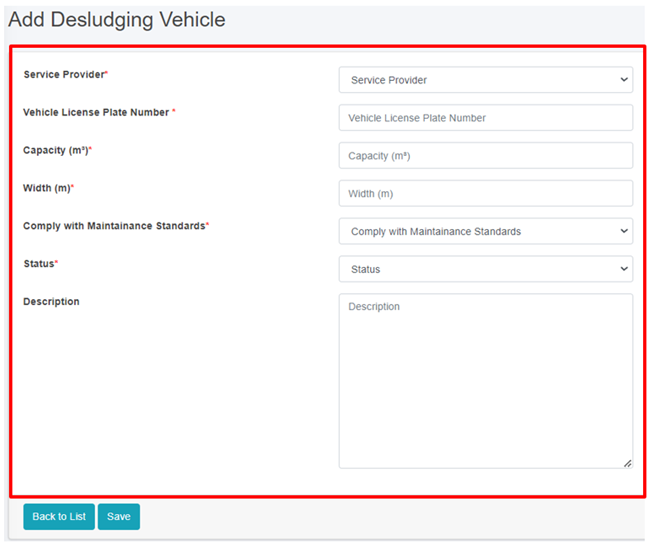
Figure 10- 10 Add Desludging Vehicle
• After filling out the form, click Save and make sure a pop-up message is displayed, refer to section 7.1 Save for more details.
• If a mandatory form field is left out or any form failed validation during the form submission a validation message box will be prompted, refer to section 7.2 Validation Message Box for more details.
Overview:
The Add Desludging Vehicle page consists of information that are explained below:
• Service Provider - Name of the operational service provider selected from the list of pre-registered service providers.
• Vehicle License Plate Number - The license plate number of the desludging vehicle.
• Capacity (m3) - The capacity of the desludging vehicle in cubic meters.
• Width (m) - The width of the desludging vehicle in meters.
• Comply with Maintenance Standards: Ensuring that the vehicles are regularly inspected, serviced, and repaired as needed to maintain their operational efficiency, safety, and compliance with regulatory requirements.
• Status - Indicating the operational status of the Desludging Vehicles. If the status is set as non-operational, then the desludging vehicles is disabled.
• Description- A description of the desludging vehicle.
Note:
• If the desludging vehicles is present in any of the emptying, then the deletion is not allowed, only the user is permitted to set its data to non-operational.
No Comments