Setup GeoServer
GeoServer includes several styles designed for IMIS. To set up these styles in IMIS, create a workspace and corresponding datastore connecting to the IMIS Database after installing GeoServer. The corresponding information related to the names and other attribute information related to the workspace, stores, layer and styles information including CSS, SLDs, and SQL queries are included and regularly maintained in the technical document section with the filename `geoserver_document.md` within the documentation sub-directory in the GitHub repository named web-app source code. To create a new workspace, store, layer, and styles in a geoserver, follow the steps as mentioned in Section Creating New Workspace, Store, Layer & Style in Geoserver. Each workspace, store, layer and style must be created to ensure the proper functioning of the map interface. Currently, there is one workspace, nine stores, thirty layers and one hundred and seventeen styles. Each of these must be created as per the geoserver_document.md values in the newly set up geoserver. Alternatively, the present workspace is also provided in the GitHub repository under the deployment_documentation in the sub-directory geoserver_workspace_setup, which can also be imported into the geoserver through minor modifications to the XML file that is mentioned below.
To launch GeoServer, start the GeoServer service and navigate to http://localhost:8080/geoserver in your web browser. This URL directs you to the GeoServer homepage. Log in using the username and password configured during the installation process.

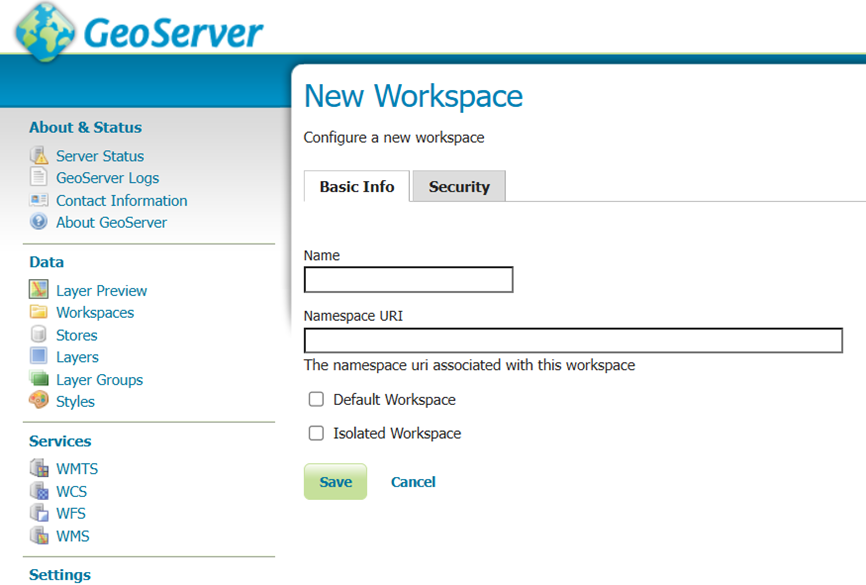
5.1 Add New Workspace
After logging into GeoServer, create a new workspace by navigating to the Workspace in the left-side menu and selecting Add new workspace.

Add a new workspace, for the workspace add the name of the current database that we are working on. For NameSpace URI add the URI that we are currently working on. In our local deployment Namespace URI may be localhost:8000
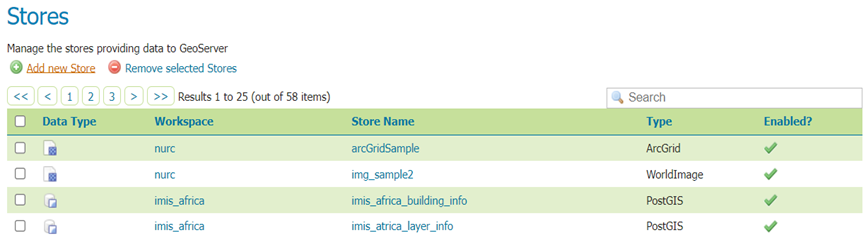
5.2 Add New Store
To add a new store in GeoServer, follow the steps mentioned below
• On the left sidebar, select Stores.
• This will open the main Stores page where existing stores are listed.
• On the Stores page, look for the Add New Store link or button.
• Click Add New Store to open the form for entering the details of the new store.
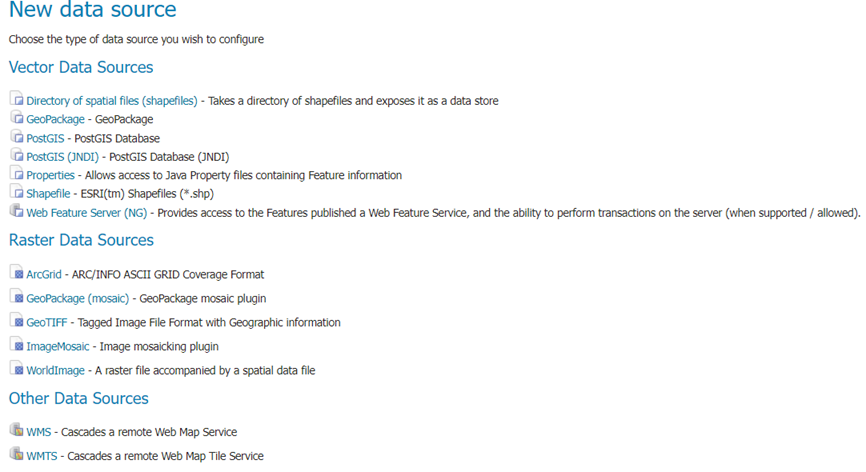
It will take you to new data source page where we are working with POSTGIS so we will select that:
After this will direct to the page where we will add details about new vector data source, On this page, you’ll first encounter the Basic Store Info section.
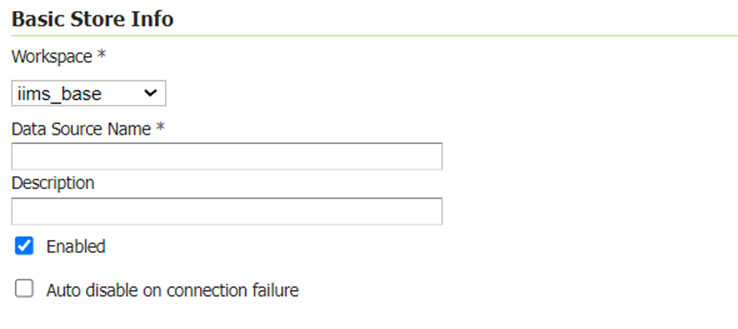
• On the Workspace, dropdown select workspace you have created.
• In Data Source Name you need to give the name as given in the GeoServer Documentation in Git Hub Organization.
[Note: While adding store for “layer_info” make sure you tick “Expose Primary Key” option.]
After this on the connection parameters section:

• On database label, put the database name which you are working on.
• On the schema put the schema name you are working on.
• For the user and password, you will put the credentials used for the pgAdmin.
Once finished, click on the apply and then save.